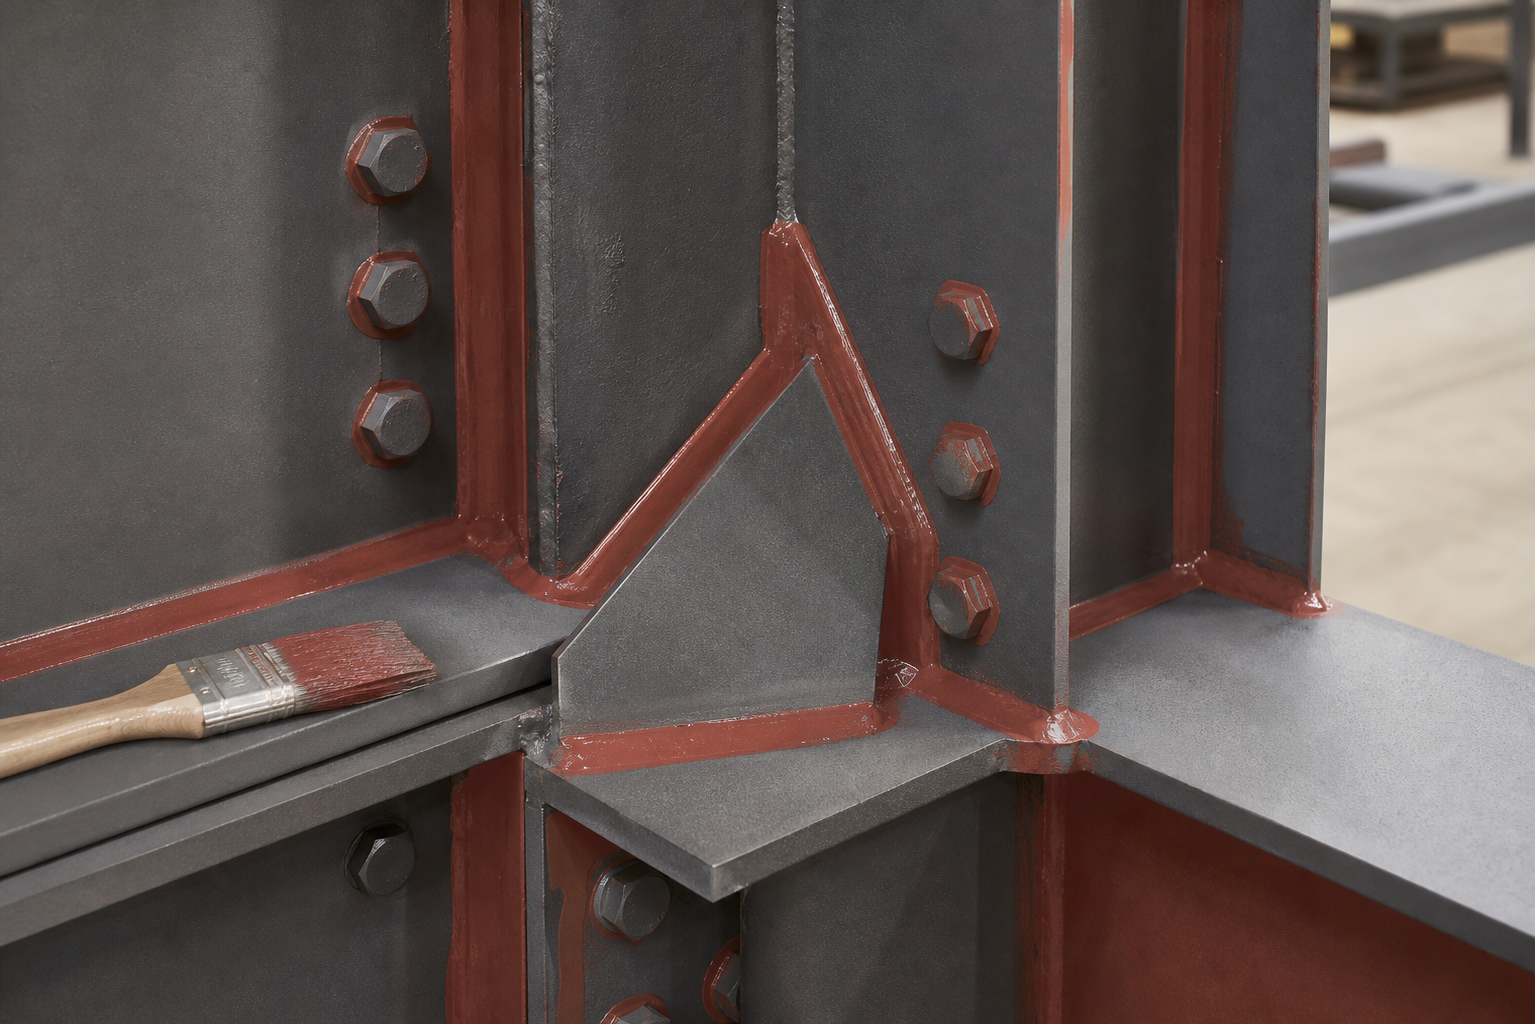
Stripe coating is the deliberate application of an extra coat to structural-steel details that are difficult to cover uniformly by spray or roller. Edges, welds, bolt heads, corners, crevices, stiffeners, and irregular connections can receive less protective film than broad flat surfaces. A controlled stripe coat gives those vulnerable geometries focused attention before the next full coat is applied.
It is not decorative touch-up and it cannot rescue contaminated steel, poor blasting, missed defects, or an incompatible coating system. The work must be specified, sequenced, inspected, and documented as part of the complete corrosion-protection plan.
Why difficult geometry needs a stripe coat
Liquid coatings tend to pull away from sharp edges as they cure. Spray patterns can shadow areas behind bolts, plates, stiffeners, and weld profiles. Tight inside corners can trap air or receive an uneven film, while outside corners are vulnerable to thin coverage and later mechanical damage. These local weaknesses matter because corrosion often begins at discontinuities where water, salts, and debris collect.
The active UFGS 09 97 13.27 requires a stripe coat of intermediate epoxy material, applied by brush and worked into corners, crevices, angles, welds, outside corners, and angles. It also connects stripe-coat timing to the primer and intermediate-coat recoat windows. That is a useful model for project specifications: define the material, target details, method, timing, and inspection point rather than merely saying “stripe coat as needed.”
Stripe coating is part of a system
ISO 12944-7:2017 addresses execution and supervision of protective paint work on steel structures in shops and in the field. It does not replace the project coating schedule or the coating manufacturer’s instructions. The designer must select a system appropriate to the environment, substrate, service conditions, access, and expected maintenance strategy.
Before stripe coating starts, the steel must already meet the specified visual cleanliness standard, surface-profile requirement, and soluble-salt limit. Weld spatter, burrs, laminations, sharp projections, oil, dust, and inaccessible pockets should be resolved at the correct hold point. Applying extra coating over a defect hides evidence without creating a durable interface.
Details to include in the stripe-coat map
A project-specific map or marked-up drawing makes the scope auditable. Typical candidates include:
- plate edges, cutouts, cope holes, drain holes, and outside corners;
- fillet welds, weld toes, irregular weld profiles, and repaired weld areas;
- bolt heads, nuts, washers, fastener groups, and connection plate perimeters;
- inside corners at stiffeners, diaphragms, gussets, brackets, and attachments;
- crevices and narrow gaps that are permitted to remain by the design;
- areas shadowed from the planned spray direction;
- small repairs and exposed edges created during erection or access work.
Do not assume every narrow joint can simply be filled with paint. Some joints require sealant, design modification, or a specific treatment; some faying surfaces have separate requirements that must not be altered. The responsible engineer and coating specialist should resolve ambiguous details before application.
Pre-application quality gates
Confirm the approved materials
Verify the coating product, batch, mixing ratio, induction time, thinner restrictions, pot life, and recoat window. A stripe coat is normally part of the approved system, not an unlisted material chosen for convenience. Record batch numbers and mixing time so a later defect can be traced.
Check environmental conditions
Measure air temperature, steel temperature, relative humidity, and dew point at representative locations. Continue environmental monitoring through application and curing as the specification requires. Confined corners and massive connections may not track ambient temperature as quickly as thin exposed plates.
Verify primer condition and timing
The primer must be sufficiently cured for the intended operation but still within the permitted overcoating interval. Inspect it for contamination, overspray, pinholes, damage, rust breakthrough, and unacceptable roughness. If the recoat window has been exceeded, follow the approved preparation procedure; do not improvise with solvent wiping or sanding.
Application method and sequencing
- Establish a witness area. Demonstrate the brush, material, coverage width, workmanship, and sequence on representative geometry. Agree on what acceptable coverage looks like before production accelerates.
- Work material into the detail. Use the specified brush or approved method to wet edges, weld contours, bolt perimeters, and corners. The goal is continuous coverage without entrapped air, holidays, heavy ridges, or uncontrolled runs.
- Maintain a practical band. Extend the stripe coat far enough beyond the vulnerable detail to overlap reliably with the full coat. The project documents or approved procedure should define expectations rather than relying on inconsistent judgment.
- Control wet film and build. Extra local coating is useful only within the system’s limits. Excessive build can trap solvent, crack, sag, bridge gaps, or interfere with curing and subsequent coats.
- Respect recoat windows. Record start and finish times. Allow the stripe coat the specified drying time while ensuring the next full coat remains within the governing window.
- Inspect before concealment. Make stripe coating a hold or witness point before the broad intermediate or finish coat obscures the work.
A defensible stripe-coat record proves which difficult geometries were treated, with which approved material, under what conditions, and before which full coat.
Inspection and acceptance
Visual inspection should confirm complete treatment of the mapped details, correct material, adequate overlap, and freedom from misses, pinholes, bubbles, runs, sags, contamination, and dry spray. Photographs should show representative connections and identify the member or location. Record environmental readings, batch data, mixing times, application times, inspector, and disposition of defects.
Final dry-film thickness testing remains important, but ordinary probe readings on broad flat areas may not characterize edges, weld toes, or crowded fasteners. Use suitable probes and procedures where geometry allows, and combine measurements with visual evidence and process records. Do not claim that an inaccessible edge has passed solely because nearby flat steel meets the thickness range.
After the complete system cures, specified holiday detection or other continuity checks may provide additional evidence. These tests have their own limits and voltages; they do not replace proper stripe-coat inspection before concealment.
Common failures and corrective action
- Missed back sides and shadow zones: stop and remap the accessible work before the next coat.
- Heavy ridges or runs: allow the material to cure as required, then prepare and repair it under the approved procedure.
- Pinholes around welds: investigate surface condition, application technique, air release, and coating suitability rather than repeatedly brushing over uncured defects.
- Contamination between coats: identify the source and restore the required cleanliness before recoating.
- Expired recoat window: obtain and follow the documented surface-preparation instruction for the specific system.
- Coating bridged across a gap: consult the designer and manufacturer; a cosmetic film bridge is not a durable seal.
Repairs should be feathered and cleaned as required, rebuilt with compatible coats, and reinspected. Maintain the same environmental and batch records used for the original work. Repeated defects in similar details may justify expanding the inspection lot and reviewing access, lighting, brush selection, worker technique, and production pressure.
Limitations owners should understand
Stripe coating reduces local under-coverage risk but does not eliminate corrosion. It cannot correct an unsuitable design detail, active leakage, chloride contamination, inaccessible crevices, poor drainage, incompatible materials, or a coating system selected for the wrong exposure. Areas hidden after assembly may require shop coating, sealing, metallizing, cathodic protection, or a different detail.
The FHWA steel construction review guidance treats coating inspection as a sequence that includes surface preparation, protection from overspray, visible defects, pinholes, and thickness. Owners should use the same systems view. Stripe coating is one controlled operation inside a broader steel coating QA/QC plan.
FAQ
Is stripe coating always applied before the full coat?
The approved specification and manufacturer instructions control the sequence. Many systems apply a stripe coat to vulnerable details before the corresponding full coat so coverage can be inspected, but project requirements vary.
Can spray application replace brushing?
Only if the governing specification and approved procedure allow it and the method achieves the required penetration and coverage. The active UFGS high-performance steel-coating specification calls for brush application of its intermediate stripe coat.
Should bolt threads and faying surfaces be stripe coated?
Do not coat connection surfaces or threads by assumption. Structural bolting, slip-critical faying surfaces, galvanized assemblies, and exposed threads can have specific requirements. Follow the drawings, bolting specification, and approved coating plan.
Does a stripe coat count toward total film thickness?
It is part of the applied coating system, but local and total thickness still must remain within specified and manufacturer limits. More material is not automatically better.
What should the inspector photograph?
Capture the witness area, representative edges and welds, crowded connections, repaired misses, batch identification, and each inspection lot before the next full coat hides the stripe work.
Plan the details before access disappears
Structural Rehab can help owners and project teams review steel corrosion details, coating specifications, access constraints, and inspection hold points. Book a structural rehabilitation consultation to discuss a practical repair and protection plan. The site’s free structural repair ebook can support early planning, while project-specific decisions should remain with qualified engineering and coating professionals.
Need a professional structural assessment?
Book a consultation with Structural Rehab to evaluate repair priorities, corrosion risks, and rehabilitation options before damage escalates.
Book Consultation