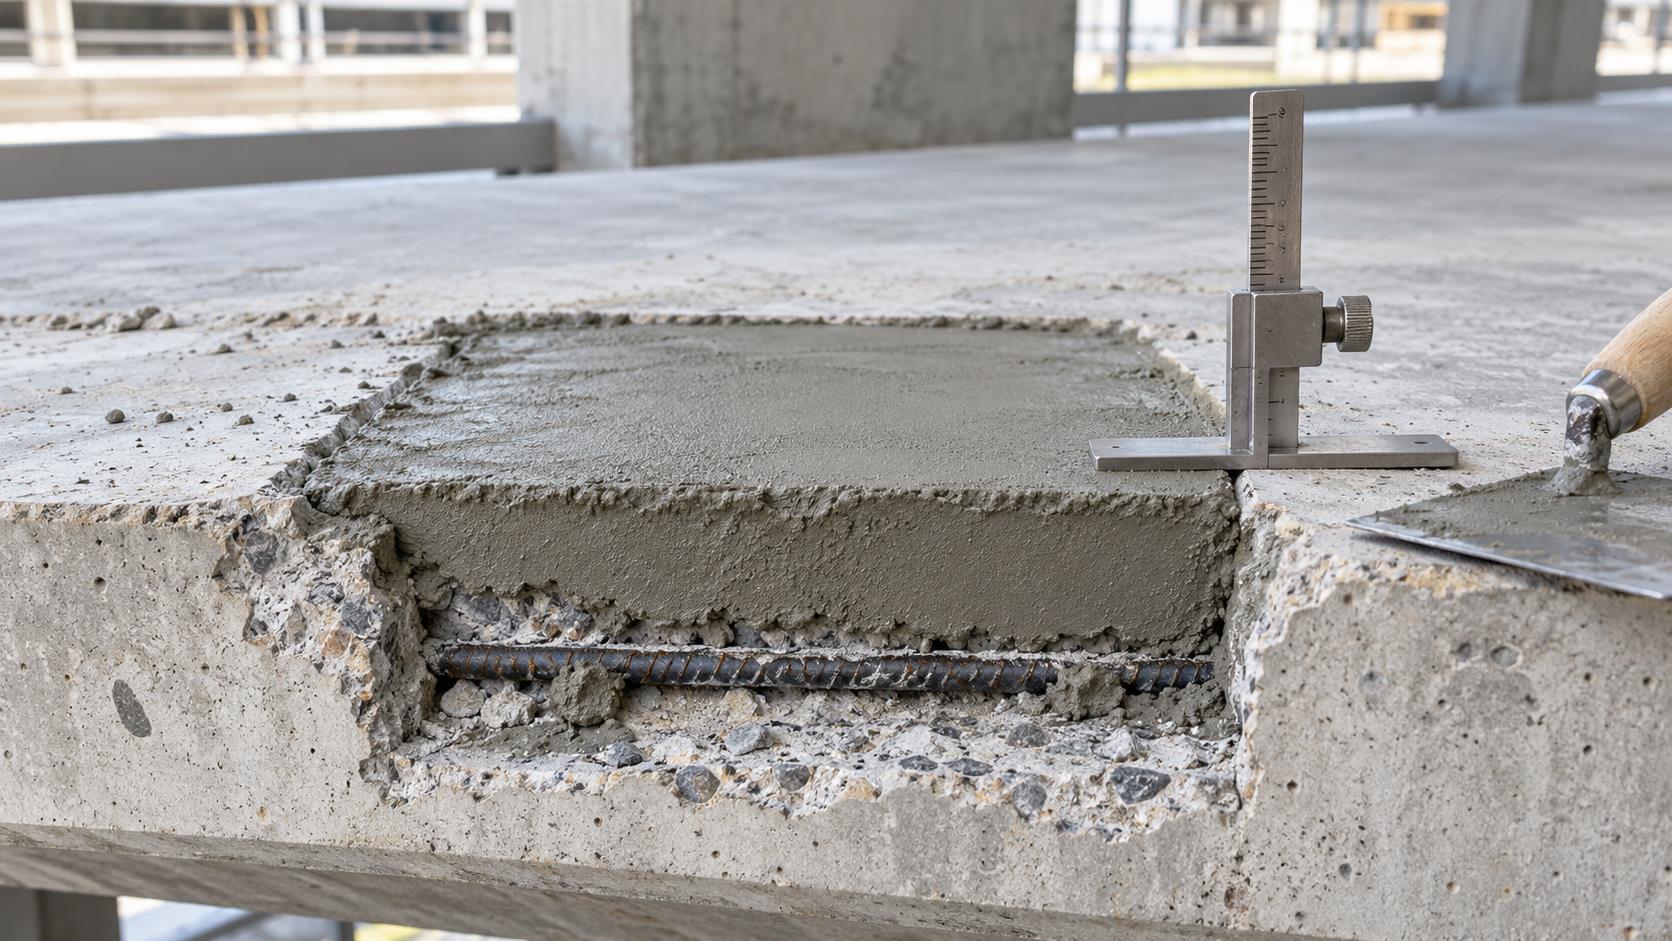
Concrete repair mortar lift thickness is a construction-control issue, not a field preference. A repair can have sound boundaries, a compatible material, and a clean substrate yet still be vulnerable if one placement exceeds the product’s permitted build, traps voids around reinforcing steel, or receives a second lift before the first is ready. The repair documents should therefore convert the selected material’s data sheet and the engineer’s design into observable hold points.
This guide is for owners, engineers, contractors, and inspectors managing cementitious patch repairs. It explains how to control lift thickness without turning a generic rule of thumb into a repair design. The engineer of record remains responsible for the repair scope, loads, detailing, and acceptance criteria.
Start with the repair geometry, not the bag label
Measure and record the actual removal depth after unsound concrete is removed. The deepest point, the shallowest feather-edge risk, clearance behind exposed steel, and the orientation of the work all affect a workable placement plan. That plan should identify whether the repair is horizontal, vertical, overhead, formed, pumped, or hand-applied. A material acceptable for a shallow horizontal placement may not be suitable for a deep vertical build.
Do not use compressive strength alone to select a patch. TxDOT notes that excessively high strength can transfer excessive load into a repair material and that compatible properties matter in intermediate spall repairs. Its guidance also distinguishes neat and extended materials: it calls for following the product information for minimum thickness and, for vertical or overhead work, limiting a lift to 2 inches or the supplier’s lower maximum. Those are project-specific controls, not universal dimensions for every repair.
Before material arrives at the repair, reconcile four documents: the repair drawings, the specification, the approved product data, and the contractor’s placement plan. If they disagree, pause for an engineer or specifier decision. Increasing water, changing aggregate, or placing a deeper lift because the area looks small is not a substitute for that decision.
Build a lift-thickness QA/QC plan
1. Define the permitted build
The approved material system should state its minimum and maximum application thickness, whether aggregate extension is allowed, the permitted orientation, and any requirement for multiple lifts. Record the exact product, lot, component ratio, and technical-data revision. If extension is permitted, record the aggregate type, size, proportion, and approval—not simply that “stone was added.” TxDOT cautions that aggregate size must fit the available clearance around reinforcement and that minimum application thickness can vary with material and aggregate size.
2. Make the repair profile measurable
Use a depth gauge, straightedge, template, or marked control pins that suit the repair geometry. Measurements should be tied to a repair ID and taken before placement, after each lift, and at final finish where practical. A sketch or marked photo can show the locations more clearly than a single average depth. This record helps distinguish a localized deep pocket that needs a different material or form from a uniform repair that can be placed as planned.
3. Establish release points
Useful hold points include: acceptance of removal limits; confirmation that reinforcement clearance and condition meet the repair detail; substrate cleanliness and specified moisture condition; batch verification; first-lift thickness; readiness for the next lift; and final profile and curing protection. A hold point should identify who may release the work, what evidence is required, and what happens if the criterion is missed.
Prepare the substrate so a lift can bond
Thickness control cannot compensate for weak or contaminated parent concrete. The FHWA partial-depth repair guidance calls for removal to sound, clean concrete and for exposed faces to be cleaned of loose particles, oil, dust, and other contaminants before patching. It also emphasizes re-sounding after removal to find remaining weak areas. For broader condition planning, see our guide to concrete repair condition-survey mapping.
Where reinforcement is exposed, verify clearance and the repair detail before placement. Do not chip around exposed prestressing strand without engineer direction. For ordinary reinforcing steel, document the observed condition and the clearance needed for the chosen material to flow and consolidate. Our article on exposed rebar in concrete repair explains why cleaning alone is not a complete disposition for section loss or inadequate cover.
Place and inspect each lift
Mix only the amount that can be placed within the material’s stated working time. Confirm the specified water or liquid component, mixing duration, and consistency test where one is required. Do not add water after a batch begins to stiffen unless the manufacturer and project requirements expressly allow it. Batch consistency and lift thickness are separate controls: a good flow result does not prove that the repair has been placed within its permitted build.
Consolidate the material using the approved method, especially around bars, corners, and the interface. Excessive vibration can segregate some repair mortars; insufficient consolidation can leave voids. For vertical and overhead repairs, check that the material is stable rather than slumping. TxDOT directs that a receiving surface for subsequent lifts be roughened and clean, with the substrate brought to saturated-surface-dry condition where its procedure applies. Use the approved product system and specification when their requirements differ.
Before a second lift, inspect the prior surface and record its condition, elapsed time, surface preparation, and moisture condition. The relevant question is not whether the crew has time to continue; it is whether the specified bond condition for that system has been achieved. This is closely related to the controls in our guide to bonding-agent open-time QA/QC.
Common failures and the right response
- One deep placement exceeds the product limit: stop, protect the work, and obtain a documented disposition. The answer may be staged lifts, an approved extended material, form-and-pour work, or a revised repair detail.
- Material bridges over reinforcement: do not conceal the condition. Verify clearance, material size, and consolidation approach with the engineer or material representative.
- The first lift dries, cracks, or is contaminated before the next: evaluate the interface against the specification; it may need removal or re-preparation rather than a cosmetic cover-up.
- Final geometry is proud or low: compare it with the specified profile and service requirements before grinding or adding material. Unplanned finishing can reduce cover or create a feather edge.
Documentation that helps an owner make decisions
A concise record package should include repair IDs, removal and lift measurements, product and lot information, batch records, ambient conditions, substrate condition, photos before each release, deviations, and curing logs. Pair it with the project’s inspection plan instead of relying on a generic checklist. For a practical record structure, see concrete repair daily logs and concrete repair curing and protection.
ACI describes ACI CODE-562 as a code covering the assessment, repair, rehabilitation, durability, construction, and quality assurance of existing concrete structures. It is a useful framework, but project documents and the authority having jurisdiction determine the applicable requirements. Repair teams should not infer a material thickness or acceptance rule from a general web article.
Limitations
This article does not design a repair, approve a proprietary material, or establish a maximum lift for a particular project. Structural demand, exposure, restraint, reinforcement congestion, shrinkage compatibility, curing, fire rating, and access can change the correct solution. Where deterioration reaches prestressing, primary reinforcement, bearings, or a load-critical region, obtain a qualified engineered assessment before removal or placement.
FAQ
Is a thicker lift always stronger?
No. Thickness must stay within the approved repair system and detail. A thicker placement can create placement, consolidation, shrinkage, or bond risks even when the material has a high compressive strength.
Can a contractor add aggregate to make a deeper repair?
Only when the material supplier, specification, and engineer allow that extension and the aggregate fits the repair geometry. Document the approved aggregate and proportion.
Who releases the next lift?
The project quality plan should name the responsible role and the evidence required. For critical repairs, that may include an inspector and engineer-defined acceptance criteria.
Need an independent repair-planning review? Structural Rehab can help owners organize condition evidence, QA/QC hold points, and the questions to take to a qualified repair engineer before work proceeds.
Sources
- TxDOT Concrete Repair Manual: Intermediate Spall Repair
- FHWA: Partial-Depth Repairs—Construction
- American Concrete Institute: ACI 562 Repair Code
Need a professional structural assessment?
Book a consultation with Structural Rehab to evaluate repair priorities, corrosion risks, and rehabilitation options before damage escalates.
Book Consultation