SSD substrate moisture is a small part of a concrete repair specification that deserves a clear field procedure. For many cementitious repairs, the prepared concrete must contain sufficient moisture without carrying free water when the repair material is placed. A cavity that was washed earlier in the shift may have dried; another may retain water in its corners. Both need attention before the surface disappears beneath mortar.
This guide addresses moisture conditioning of existing concrete immediately before cementitious patching or section restoration. It helps owners, engineers and inspectors turn an instruction such as saturated surface dry into a documented placement decision. It does not prescribe one moisture percentage or soaking time for every material.
What saturated surface dry means at a repair interface
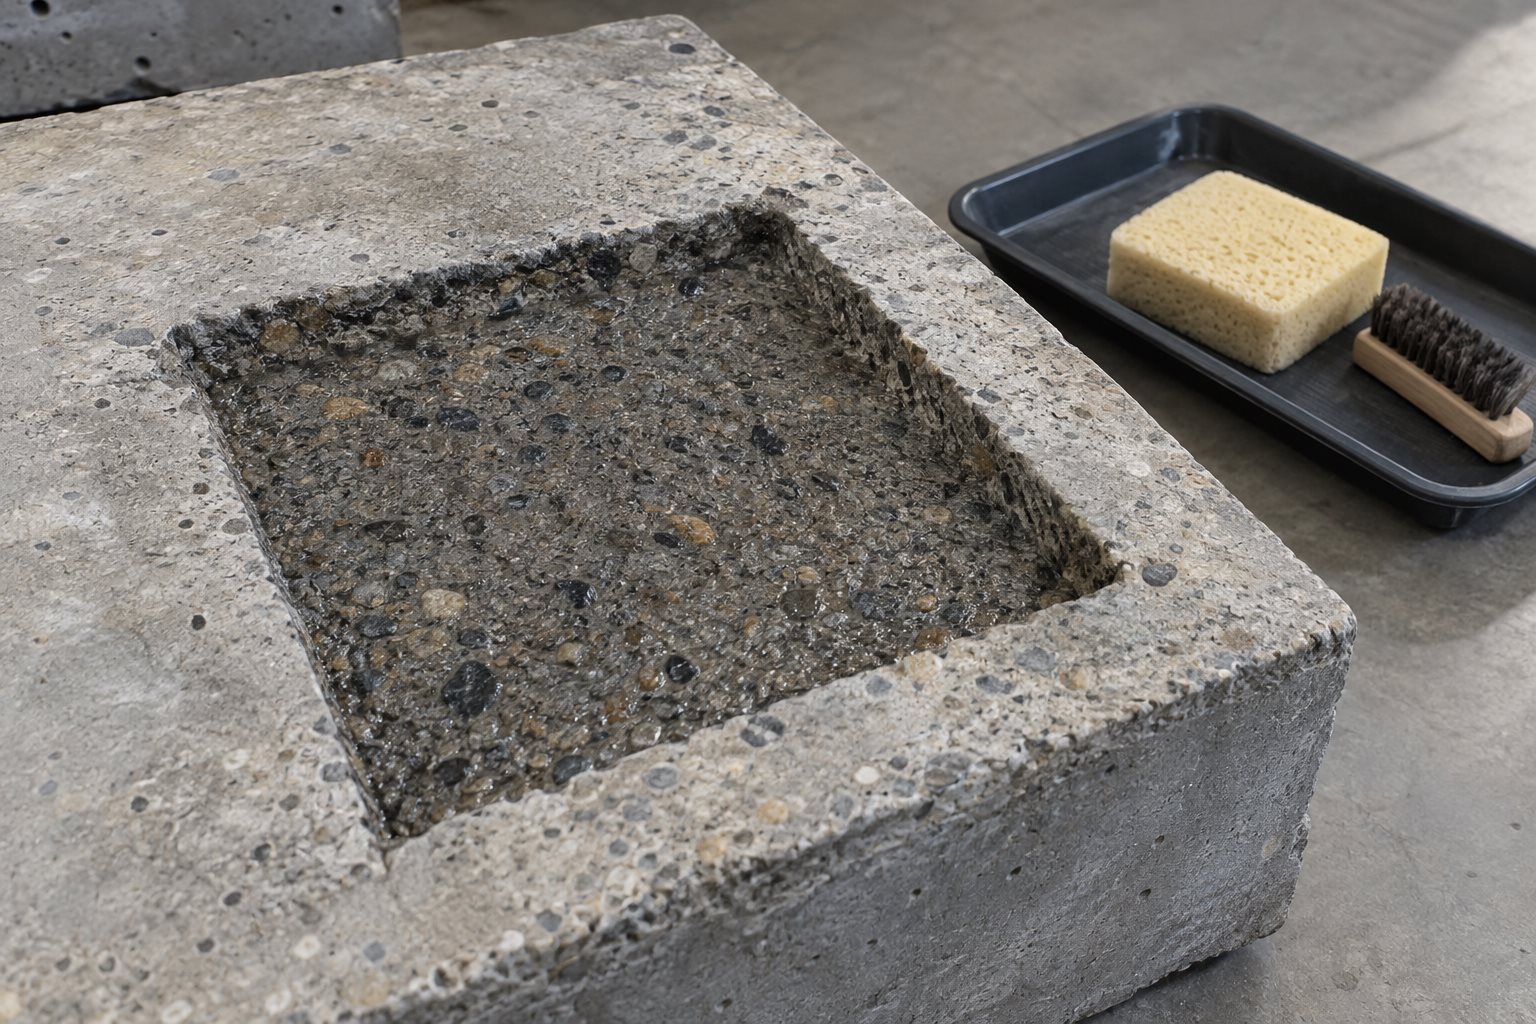
SSD describes a porous material with water in its permeable pores but no free water on its exposed surface. In repair work, the practical objective is to condition the bonding surface according to the approved system. The TxDOT intermediate-spall repair procedure calls for a damp substrate without standing water immediately before cementitious material application. Its preparation instructions belong to that repair procedure; they should not be transferred indiscriminately to another project.
A dull, damp appearance can be a useful observation. It is not a direct measurement of pore saturation, moisture depth or future bond strength. Surface color also changes with aggregate, paste, lighting and previous exposure. A damp photograph is not a placement-time moisture record. Record how the area was conditioned and what was observed when the work actually began.
Why the specified system controls the decision
Moisture conditioning affects the repair interface. The ACI presentation abstract on optimum substrate moisture identifies its influence on bond and durability. It does not establish a universal field acceptance number. Avoid turning that general relationship into a claim that every damp surface will bond or every dry surface will fail.
Read the current regional product instructions alongside the repair specification. Identify the mortar, any bonding primer, reinforcement treatment and successive repair layers as one installation sequence. Resolve inconsistent instructions with the responsible engineer and supplier before production. Do not allow an inspector to choose between incompatible requirements while a mixed batch waits.
For example, the UK instructions for Sika MonoTop-4052 specify prewetting for at least two hours, keeping the surface wet during conditioning, and achieving a dark matte SSD appearance. That duration is a product-specific example, not a general minimum for concrete repair. Its primer and application instructions also matter.
The Canadian instructions for Sika MonoTop-623 F require a damp SSD repair surface without standing water or a glistening film at application. They also describe a scrub coat of the mixed mortar. Neither example authorizes substituting a different primer or changing the approved mix water.
Write a moisture-conditioning plan before batching
The following workflow is a proposed project checklist, not an additional standard. Adapt it to the approved material and demonstrate it on a representative repair area before using it for production.
1. Identify the area and its constraints
Give each cavity or placement zone a location reference. Note whether it is horizontal, vertical or overhead; whether forms restrict access; and whether water collects behind reinforcement or at low points. Establish how the inspector will see the entire bonding face. If access will disappear when forms close, decide the inspection sequence beforehand.
Keep moisture release separate from acceptance of soundness and cleanliness. Wetting cannot resolve weak concrete, residual slurry, oil or an unsuitable profile. Complete those checks first, using the project requirements and the principles in concrete surface profile before repair.
2. Define the conditioning method
Specify the permitted water source, wetting method, duration, protection and excess-water removal method. Include responsibility for maintaining the condition during interruptions. The GSA concrete patching procedure illustrates planning that keeps a repair area wetted and removes excess water before placement. It is a project procedure reference, not proof that the same schedule suits every proprietary mortar.
Plan collection and disposal of runoff so it does not contaminate adjacent work or create access hazards. Choose tools that can reach recesses without depositing oil, fibers or debris. Any compressed-air method must meet the project’s cleanliness and safety requirements; it should not become uncontrolled drying of the accepted surface.
3. Make the release expire when conditions change
Define events that require reinspection: a delay, direct sun reaching the area, stronger wind, unexpected rain, additional washing, a leak or a change of placement zone. A release given at the start of a shift should not automatically cover all repairs until evening. Smaller zones make it easier to connect the inspection with the actual placement.
Inspect immediately before material application
Use a short documented walk-through with the person responsible for placement. The purpose is to establish whether the approved procedure has been followed and whether the surface still matches its required condition. Do not improvise a numerical moisture limit from a handheld meter unless the project has established an applicable method and criterion.
- Confirm the location, selected repair system and relevant instruction revision.
- Check the recorded start and continuity of conditioning against the approved procedure.
- Inspect the full bonding face, edges, corners and low points for remaining water or renewed drying.
- Confirm that surface cleaning and reinforcement work have not introduced contamination since the earlier inspection.
- Verify that the crew can place the planned batch within the applicable material and primer windows.
- Record release, corrective work or a hold, with the time and responsible person’s name.
Use photos to supplement this record. Include an overview locating the repair and a closer image of the surface, but avoid treating either as a moisture test. Integrate the release with the wider pre-placement inspection for concrete repairs so forms, material readiness and curing arrangements are checked together.
Handle dry spots, water films and interruptions
The cavity dries before the crew arrives
Hold the affected zone and restore the specified condition using the approved procedure. Review why the release and placement were separated: the zone may be too large, protection inadequate, or batching poorly coordinated. Do not compensate by adding extra water to the repair mortar. Substrate conditioning and batch proportions are different controls.
Water remains in corners or returns after removal
Remove excess water by the permitted method and reinspect. If water repeatedly returns, investigate the source before proceeding. Rain runoff, leakage and trapped water require different responses. An ordinary SSD instruction is not approval to place a standard repair mortar into flowing water. Any alternative system or water-control measure needs a documented disposition.
The primer window is missed
Follow the system’s written recovery instructions. Do not assume that rewetting, adding another coat, or placing mortar over a dry bonding layer will restore compliance. Identify the affected area and obtain a disposition before covering it. Record any removal and reapplication so the final repair history explains what changed.
Use trials to improve the procedure
A useful trial represents the real substrate, orientation, exposure and access constraints. Record the same conditioning and placement sequence proposed for production. If a shaded sample behaves differently from a sun-exposed repair zone, the trial may not have demonstrated the intended work conditions.
Agree on inspection and testing before the trial. Where bond testing is specified, use the selected method, test locations, ages and acceptance criteria; interpret results with the observed failure location. A passing material strength specimen does not independently accept the repair interface. The guide to pull-off testing for concrete repair bond explains that distinction.
When performance is unsatisfactory, review moisture together with substrate quality, preparation, mixing, consolidation, thickness and curing. Change the procedure through a controlled trial rather than declaring one visible condition to be the cause. Keep unsuccessful trial records because they explain the basis for the eventual production method.
Records the owner should receive
A compact release sheet can connect repair location, instruction revision, conditioning times, exposure observations, excess-water removal, primer application, placement start and photographs. Add interruptions, corrective actions and the disposition of held areas. Link the sheet to batch and subsequent testing records using the same location reference.
These records help distinguish an approved process from an undocumented assumption. They do not guarantee service life. The engineer still needs to address the original deterioration mechanism, repair compatibility, loading, protection and the inspection plan after completion.
Limitations and frequently asked questions
Does SSD mean the surface must look dry?
No. The term refers to the absence of free surface water while the porous substrate is conditioned. Many repair instructions describe a damp or matte surface. Use the appearance and procedure specified for the selected material; do not wait for the concrete to become visibly pale just because the term contains the word dry.
Is a two-hour soak always sufficient?
No. The example above belongs to one product’s instructions. The project must account for its chosen system and actual substrate. A timer alone does not establish that a cavity has the required condition at placement.
Can coating moisture tests certify SSD?
Do not assume equivalence. A coating’s moisture acceptance requirements answer a different installation question. Use only a method and criterion accepted for this repair process; do not convert an unrelated meter reading into an SSD certificate.
Does this apply to epoxy repairs or underwater placement?
No universal extension is intended. Resin systems, underwater materials and specialist primers may require different conditions. This guide also does not authorize concrete removal, structural loading changes or work around prestressing. Those decisions require project-specific engineering and safe access arrangements.
Need help reviewing a moisture-conditioning method statement or repair inspection plan? Book a Structural Rehab consultation with the repair location, proposed material, current instructions and available site photographs.
Need a professional structural assessment?
Book a consultation with Structural Rehab to evaluate repair priorities, corrosion risks, and rehabilitation options before damage escalates.
Book Consultation