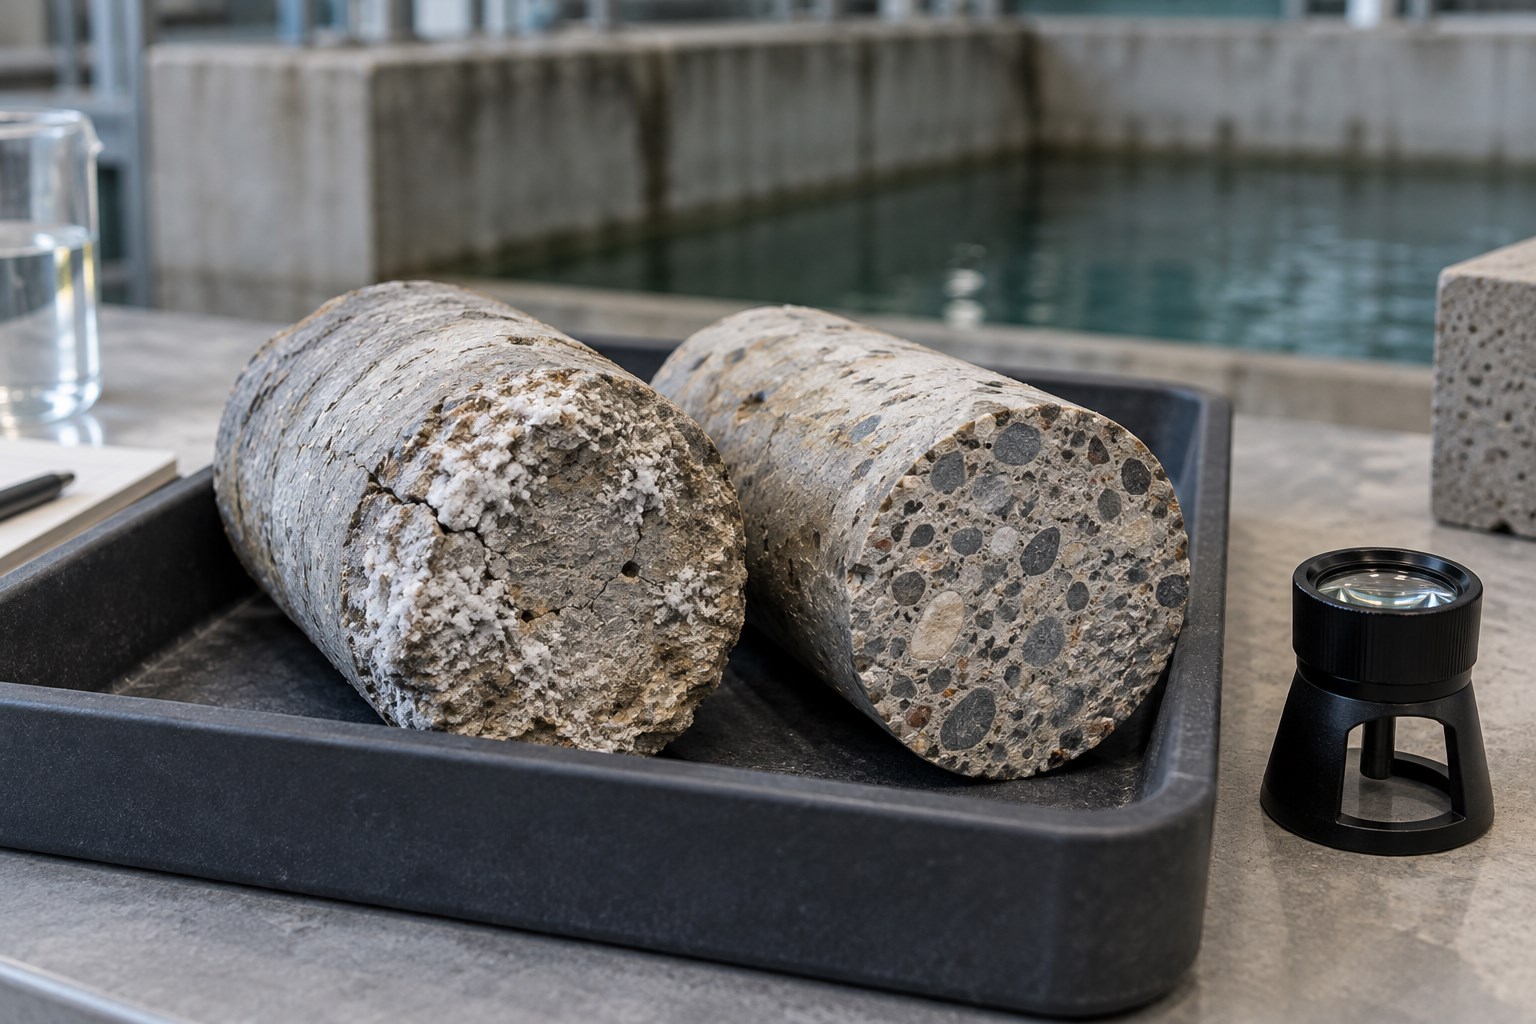
Sulfate attack concrete repair starts with identifying what is damaging the cement paste and how far the damage extends. A cracked wall beside sulfate-bearing groundwater may need a different repair from a surface with harmless salt deposits. Covering both with the same mortar can conceal the evidence while leaving the exposure active.
For owners of concrete foundations, basement walls, bridge substructures and water-retaining structures, the key decision is whether a local repair can remain durable on the retained concrete. This guide focuses on suspected external sulfate attack: investigation, repair boundaries and acceptance records. It does not provide a universal chemical threshold or authorize structural removal.
Recognize warning signs without diagnosing by appearance
Map cracking, expansion, softened paste, surface loss and white deposits justify investigation, but none identifies sulfate attack by itself. The FHWA guidance on materials-related distress explains that visual signs overlap with other mechanisms and that laboratory evaluation is needed. Although the document concerns pavements, this diagnostic limitation is relevant when planning investigations of other concrete elements; its pavement repair details should not be transferred directly to buildings.
Ask the investigation team to record where distress occurs relative to wet soil, leaks, groundwater levels, evaporation zones and earlier patches. Compare faces with different exposure histories. Photograph the same locations with a scale and stable reference points. Where loose concrete threatens occupants or deterioration affects a critical member, arrange an engineering safety assessment before sampling or removal.
Separate the mechanism from the word sulfate
Sulfate deterioration is not one uniform process. ACI’s sulfate attack symposium overview distinguishes internal and external sources and chemical and physical damage modes. That distinction changes the questions asked of the laboratory and the protection strategy.
External chemical attack
Sulfates transported into concrete can react with the cementitious matrix. The investigation should establish a plausible external source and relate changes in the paste to the observed distress. A chemical result without location, depth and a comparison basis provides an incomplete explanation.
Physical salt damage and other mechanisms
Wetting, drying and salt crystallization can contribute to deterioration without being equivalent to the chemical expansion measured in an immersed mortar-bar test. Internal sulfate-related processes also require a different investigation. If findings suggest internal distress, acid exposure, aggregate reaction or several mechanisms acting together, broaden the specialist assessment rather than forcing the results into an external-sulfate diagnosis.
Ettringite deserves particular care: it is also a normal cement hydration product. Its presence in a void or crack is not, alone, proof that it caused damage. The laboratory should explain the relationship among reaction products, cracking, paste alteration and exposure evidence.
Build an investigation that can define repair limits
Start with a decision list. The owner needs to know which zones can remain, where removal may be necessary, whether the supporting member needs strengthening, and what exposure can realistically be controlled. Give these questions to the engineer and laboratory before selecting samples.
Map the concrete and the water source together
Record member geometry, construction joints, drainage outlets, buried faces and previous repair edges on one location plan. Add observations of leakage, seasonal water levels and maintenance changes. A single dry-weather inspection may miss the water route that dominates during operation or rainfall.
Have the laboratory advise how to collect representative soil, groundwater or process-water samples, including containers, preservation and handling. State which chemical measurements are required and the units and analytical basis to report. Keep sample locations traceable to the concrete survey. A water analysis establishes exposure information; it does not directly measure concrete damage or residual capacity.
Use targeted concrete samples
Compare distressed, transition and apparently sound locations where those comparisons will affect the decision. Preserve the exposed surface and depth orientation when relevant. Agree specimen allocation before extraction so strength testing does not consume material needed for petrography or depth-specific chemistry. The existing guide to concrete core testing before repair covers the wider sampling and structural precautions.
ASTM C856/C856M-25 provides the practice for petrographic examination of hardened concrete. Request a report that describes the condition through depth and distinguishes observations from interpretation. Where routine microscopy leaves an important uncertainty, ask the specialist whether additional mineralogical or chemical analysis would resolve it. Do not specify an expensive test list without explaining the engineering question.
Turn laboratory findings into a repair decision
The assessment report should include a location-based conclusion, not merely a diagnosis on its cover. For each zone, record the proposed damage mechanism, observed depth, confidence, remaining uncertainty and consequence for repair design. Differences between samples should remain visible in the report rather than being hidden by one average result.
A useful review meeting separates three decisions: whether retained concrete is structurally adequate, whether its surface is suitable for the proposed bond, and whether ongoing deterioration is acceptably controlled. Passing one does not answer the others. A locally strong core does not demonstrate that every patch boundary is durable.
A repair boundary is an engineering decision supported by depth evidence, not a line around a white stain. Establish provisional limits from the investigation and require confirmation during exposure. If removal uncovers deeper softening or unexpected cracking, stop at the defined hold point and return the finding to the engineer. Avoid an open-ended instruction to remove everything that looks suspect without considering stability, reinforcement and temporary support.
Control exposure before choosing the repair system
List each practical intervention against the water route it addresses: drainage maintenance, leak correction, groundwater management or a designed barrier. Check whether that intervention could redirect water toward another part of the structure. The owner should understand which faces remain inaccessible and what residual exposure the repair must tolerate.
FHWA notes that sealing an accessible surface may not control sulfate entry from soil or groundwater at another face. Consequently, a coating proposal needs an exposure-path review, including terminations and joints. For the broader system options, see concrete surface protection after repair.
A local patch may be reasonable where sound retained concrete, manageable exposure and an engineered detail support it. Extensive deterioration, uncertain load transfer or an uncontrollable aggressive environment may justify a larger intervention or replacement assessment. Ask for the reason behind the selected option and the assumptions that would make it unsuitable.
Read sulfate-resistance data in context
ASTM C1012/C1012M-24a measures length change of hydraulic-cement mortar bars exposed to sulfate solution. It provides sulfate-resistance evidence for the tested cementitious system. It is not a test of an existing wall’s structural capacity, a bond test or a direct service-life prediction.
For a proposed repair, ask whether the report represents the actual binder combination, which edition and exposure solution were used, how long measurements continued, and which project requirement the result is intended to satisfy. An early reading or a certificate for a different mixture should not silently become approval for the supplied product.
Keep this evidence alongside thickness range, placement method, curing requirements and compatibility with the retained concrete. Structural Rehab’s repair material selection guide addresses those broader checks. Sulfate resistance is one selection requirement; it does not replace design of the repaired member or control of workmanship.
Set practical QA/QC hold points
The following is a suggested project checklist, not a replacement for the engineer’s specification. Assign a named reviewer and a record required for each release:
- Assessment accepted: mechanism, exposure information, sampling limitations and structural implications are documented.
- Removal authorized: sequence, temporary works, reinforcement precautions and provisional repair limits are approved.
- Retained substrate accepted: newly exposed conditions agree with the design assumptions, or the engineer has resolved discrepancies.
- Material accepted: supplied product and supporting durability evidence match the approved submission.
- Placement released: preparation, moisture condition, access, environmental controls and curing arrangements are checked.
- Handover accepted: repair locations, batches, inspection results, exposure-control work and monitoring responsibilities are recorded.
At handover, photograph repair edges and nearby untreated concrete. Define follow-up observations and the trigger for engineering review, such as renewed softening, spreading cracks, leakage or movement. Set inspection timing around the actual exposure cycle and consequence of deterioration rather than promising one universal interval.
Frequently asked questions
Does white powder on concrete prove sulfate attack?
No. Deposits are a reason to investigate their source and the concrete condition. Diagnosis requires an explanation that connects exposure, material evidence and distress.
Can sulfate-damaged concrete simply be patched?
Sometimes a localized repair is suitable, but only after establishing sound repair boundaries, structural adequacy and a credible durability strategy. Repeated failure at earlier patch edges is a reason to revisit those assumptions.
Does a C1012 result guarantee a durable repair?
No. It describes the tested mortar under defined conditions. The installed repair also depends on exposure, substrate condition, compatibility, details and construction quality.
How deep should sulfate-damaged concrete be removed?
There is no depth that fits every structure. The engineer should use the investigation and observations during removal to establish limits while maintaining stability and the intended load path.
Plan the assessment before approving the patch
Bring the condition map, laboratory reports, water-source information and earlier repair records to the project review. If you need help organizing those questions, request a Structural Rehab consultation. This educational guide supports informed discussion; project-specific inspection, analysis and repair design remain essential.
Need a professional structural assessment?
Book a consultation with Structural Rehab to evaluate repair priorities, corrosion risks, and rehabilitation options before damage escalates.
Book Consultation