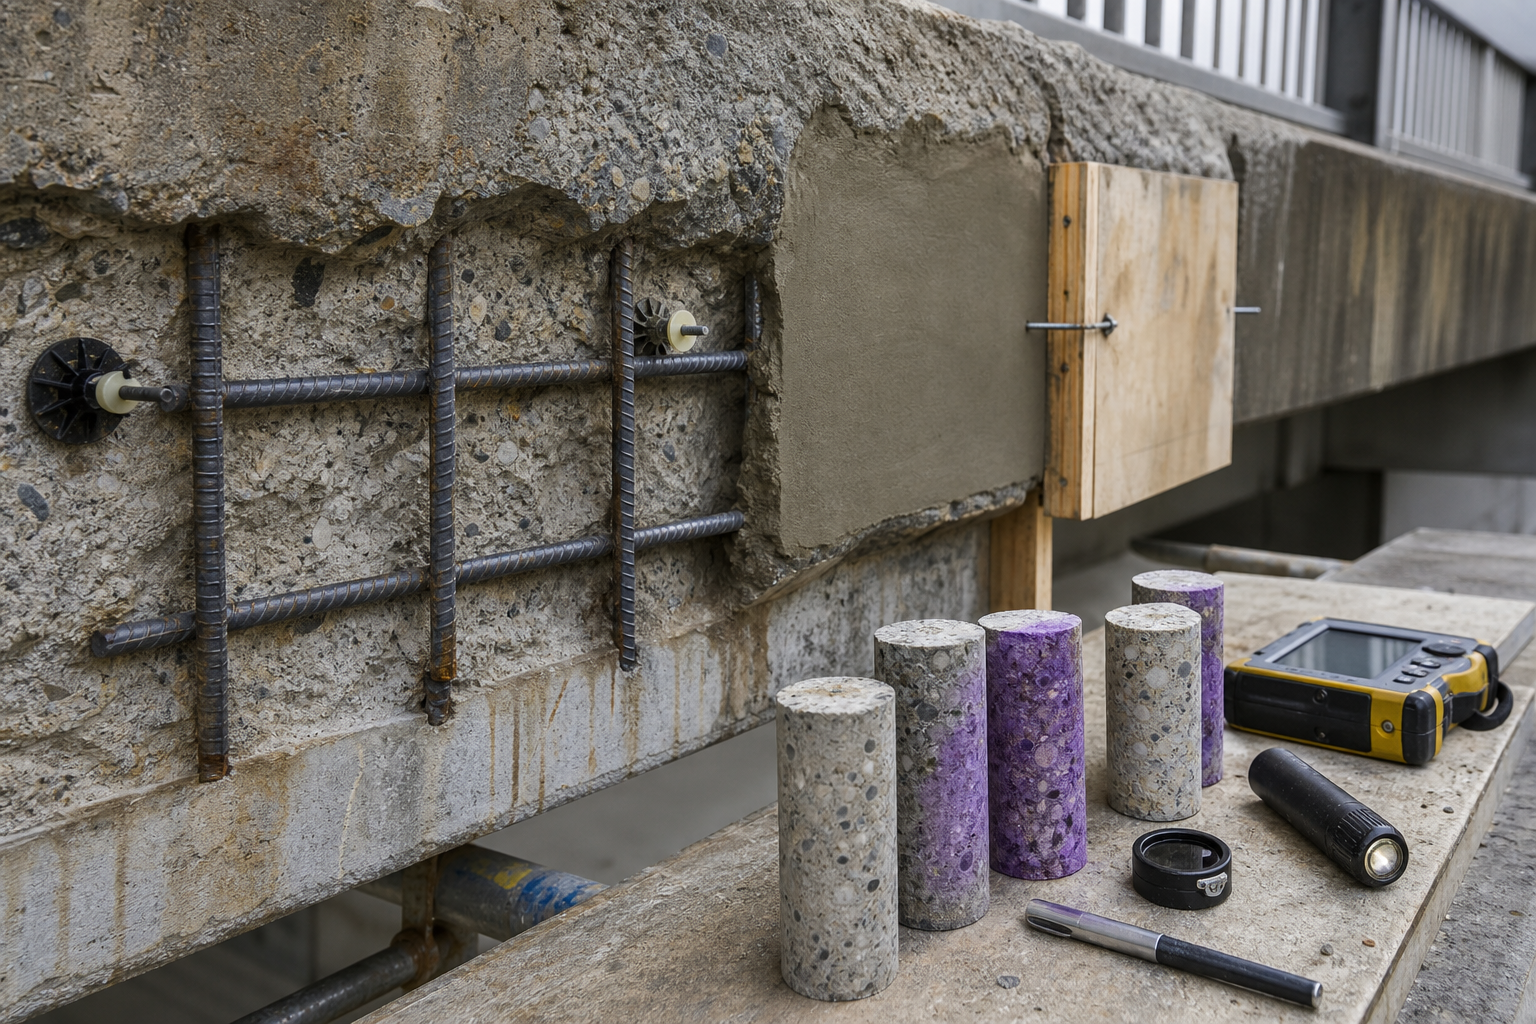
Restoring concrete cover is often treated as a patching task: remove loose concrete, clean the bar, place repair mortar, and move on. That sequence may make the member look sound, but it can leave the same corrosion drivers in place. In structural rehabilitation, cover restoration is a durability repair before it is a cosmetic patch. The depth of cover, the chloride profile, the condition of the reinforcement, the geometry of the repair edge, and the curing and protection plan all decide whether the new cover becomes a durable protective layer or a short-lived skin.
This guide explains how owners, engineers, and contractors should approach concrete cover restoration when reinforced concrete has spalled, delaminated, or lost alkalinity around embedded steel. It is not a substitute for project-specific design, but it gives a practical checklist for decisions that commonly get missed in fast repair programs.
What Concrete Cover Must Do
Concrete cover has three jobs. First, it provides a physical barrier between reinforcing steel and the environment. Second, sound alkaline concrete helps maintain the passive film that protects embedded steel. Third, it contributes to fire resistance, bond behavior, and durability detailing around laps, corners, penetrations, and exposed edges. When cover is lost, the repair should restore those functions, not merely fill a cavity.
ACI’s repair-code resources emphasize that assessment, repair design, durability, construction, and quality assurance belong in one process. For cover repairs, that means the design professional should connect test results to repair limits, material selection, reinforcement treatment, and inspection hold points. A patch that is not tied to the exposure and corrosion mechanism is a guess.
Start With the Cause of Cover Loss
The first question is why the cover failed. Common causes include chloride-induced corrosion, carbonation, low original cover, poor consolidation, honeycombing, leaking joints, impact damage, freeze-thaw distress, fire damage, or embedded metal corrosion. The visible spall may be only the final symptom. If corrosion is active around adjacent bars, replacing the missing concrete can create an anode-cathode imbalance at the patch perimeter and move the next failure a short distance away.
Use inspection methods that match the risk. Sounding and delamination mapping define the loose or debonded area. Cover meters and GPR help confirm bar depth and layout. Chloride sampling at multiple depths helps separate local contamination from a widespread chloride front. Half-cell potential, concrete resistivity, and corrosion-rate tools can help map corrosion likelihood where the owner needs a broader durability plan. For related field methods, see Structural Rehab’s guides on concrete spalling repair and chloride testing before concrete repair.
Set Repair Boundaries From Evidence
Repair boundaries should not simply follow the visible crack or spall. They should include unsound concrete, concrete with poor bond around reinforcement, and areas where testing shows the existing cover cannot provide the intended protection. Where chloride levels are high outside the visible repair, the owner may need a wider repair zone, a corrosion-control system, or a protection system rather than isolated patching.
Edge geometry matters. Feathered edges are vulnerable because thin repair material dries quickly, shrinks, and breaks down under traffic, weathering, or thermal movement. Saw-cut or squared edges are often specified so the patch has enough thickness at the perimeter. Corners, soffits, slab edges, parapets, and beam ends need particular attention because water and chlorides concentrate there and because access constraints tempt crews to leave thin, weak edges.
Clean and Evaluate the Reinforcement
Exposed reinforcement should be cleaned to the specified condition, inspected for section loss, and checked for adequate bond and embedment. Light rust staining is a different problem from deep pitting or measurable bar loss. If section loss affects capacity, the repair changes from cover restoration to structural repair and may require supplemental reinforcement, dowels, anchorage checks, or strengthening. The design should also consider whether aggressive cleaning could damage remaining bar ribs or reduce bond.
Where replacement bars or supplemental bars are needed, development length, lap length, congestion, and cover to new reinforcement must be designed rather than improvised. Post-installed dowels and anchors require drilling control, cleaning, adhesive installation, and proof or inspection requirements. The related Structural Rehab article on post-installed rebar dowels covers those QA/QC points in more detail.
Match the Repair Material to the Exposure
The repair material must be compatible with the existing concrete and the exposure. Compressive strength alone is not enough. Look at modulus, shrinkage, bond, permeability, thermal compatibility, thickness limits, placement orientation, working time, curing demand, and whether the repair is structural or protective. A very stiff, high-strength repair may not be best for an older, lower-strength substrate if movement compatibility and bond are more important than peak strength.
ICRI’s technical publication program covers repair practice areas such as evaluation, surface preparation, materials selection, and application. ASTM C1583/C1583M describes pull-off testing that can indicate the tensile strength of the prepared concrete surface or the bond/tensile strength of a repair or overlay system. These references support a simple field principle: verify the substrate and the repair composite, not just the bag or data sheet. Structural Rehab’s repair material selection guide expands on this decision.
Detail Cover Depth, Not Just Patch Thickness
Cover depth should be checked against the member, exposure, code basis, fire needs, and constructability. The target is not always “more cover.†Excess cover can increase crack width at the surface if the reinforcement is too far from the tensile face, and adding cover can create geometric conflicts at bearings, doors, drains, joint nosings, or façade lines. The repair design should state the required cover and tolerances, then explain what happens when existing bars are out of position.
In thin members or congested areas, restoring nominal cover may be impossible without changing the member geometry. Options include localized section enlargement, surface-applied protection, corrosion inhibitors, galvanic anodes, cathodic protection, or an engineered strengthening/protection system. For chloride-contaminated members, cathodic protection may be more durable than repeated patch cycles when contamination is widespread.
Build QA/QC Into the Work
A practical inspection plan should include hold points for removal limits, reinforcement cleaning and section-loss review, substrate profile and cleanliness, moisture condition, form tightness, material batching, placement, consolidation, curing, and protection from early loading or drying. Photographs, test locations, batch numbers, ambient conditions, and repair maps should become part of the project record. The record matters because cover restoration is often repeated across many small areas, and quality can drift as crews move through the structure.
Where repairs are large, repetitive, overhead, architectural, or high-risk, require a trial repair area or mockup before full production. The mockup can verify surface preparation, repair material handling, edge detailing, curing, finishing, and inspection methods in the actual project environment.
When Cover Restoration Is Not Enough
Cover restoration alone is usually not enough when corrosion is widespread, chlorides remain above threshold levels around adjacent bars, reinforcement has meaningful section loss, cracks are actively moving, drainage defects remain, or the repair area is part of a load path with uncertain capacity. In those cases, the owner needs an assessment and repair design that addresses strength, durability, moisture control, and long-term maintenance together.
FAQ
Can I patch spalled concrete without chloride testing?
For small noncritical areas in low-risk exposure, limited testing may be reasonable. For garages, marine structures, bridges, façades exposed to deicing salts, or recurring spalls, chloride testing helps decide whether isolated patching will last.
Should exposed rebar always be coated?
Not always. Bar coating, passivating primers, galvanic anodes, or cathodic protection should be selected based on the corrosion mechanism, repair material, exposure, and manufacturer requirements.
What is the biggest mistake in cover repairs?
The most common mistake is limiting the work to visible damage while leaving contaminated or unsound concrete at the repair perimeter.
Sources
- ACI 562 Repair Code portal
- ACI CODE-562-25 product information and scope
- ICRI technical publications
- ASTM C1583/C1583M pull-off test method
Need a second opinion before a concrete cover repair becomes a repeat repair? Book a Structural Rehab consultation to review deterioration evidence, repair limits, and QA/QC hold points before work starts.
Need a professional structural assessment?
Book a consultation with Structural Rehab to evaluate repair priorities, corrosion risks, and rehabilitation options before damage escalates.
Book Consultation